Having smart lights at home is one of those little luxuries that makes life a little easier. Adding a touch of smart allows automations like turning on the porch light at sunset, or dimming the bathroom lights late at night automatically.
The standard way to make your lights smart is replacing the bulbs individually, using a system like Philips Hue or IKEA Tradfri lights. While smart bulbs are a simple way to get started, they can be cost prohibitive in larger rooms, and become difficult to manage with traditional switches connected to multiple bulbs (not to mention that you must convince everyone in your home to leave the wall switches flipped on).
When I moved to Canada in 2019, our new home had a room filled with 16 'CFL' style downlights, which would have cost more than $200 to replace in total. After investigation, I discovered a better alternative: replacing the smart switches directly. Doing this allows control of multiple lights at the same time, and significantly lowers the price of making your home smart.
I've replaced the majority of the switches in our home with smart switches, which is quick, cheaper than individual bulbs, and much simpler overall. We still have a few Philips Hue bulbs around to add a little color in the TV room or living space.
I've tested a bunch of smart switches that are available in North America, so here's the best choices if you're in the market as well.
What you need to know
Here's the catch with smart switches: you need to be comfortable fidgeting around with electrical wiring. With that caveat in mind, even if you don't know much about electricity, it's simple enough to install them yourself without making a mistake.
Before you buy anything recommended here, check the wiring in your home–it'll influence what options you have, and the solution that's best for you. To swap over to smart switches, you'll need a few tools, so I recommend grabbing:
- An electrical testing pen. These are simple devices that beep if they're near electricity–which will make you feel a lot safer knowing that you pulled the right fuse before messing around with wiring.
- Electrical insulation tape. For marking the 'hot' wire, and ensuring that you can properly protect any loose ends you discover along the way.
- A sharpie. To make it easier to undo your upgrades, marking cabling as you disconnect it will help.
- A proper screwdriver set. Installing light switches involves a lot of screwdrivering, so don't do it with a knife or something, please.
- Wire nuts. These handy little gadgets make it easy to safely wire together two cables, ensuring that you're not slathering tape around or leaving any loose ends.
In this guide I won't provide specific wiring instructions for each switch, however I do provide a section at the end that will help you get started for yourself.
Before you buy
1) Neutral wiring
This guide applies specifically to Canadian wiring, however it's very similar to the types of wiring you'll find in the US as well.
The most important decider before you buy a smart switch is figuring out whether or not your home has a neutral wire—if it's absent, you can still use smart switches, but you need to be specific about the device you buy, as some require the neutral wire to be present. Older homes in North America often omit these wires, so I recommend popping open a switch to verify before you begin.
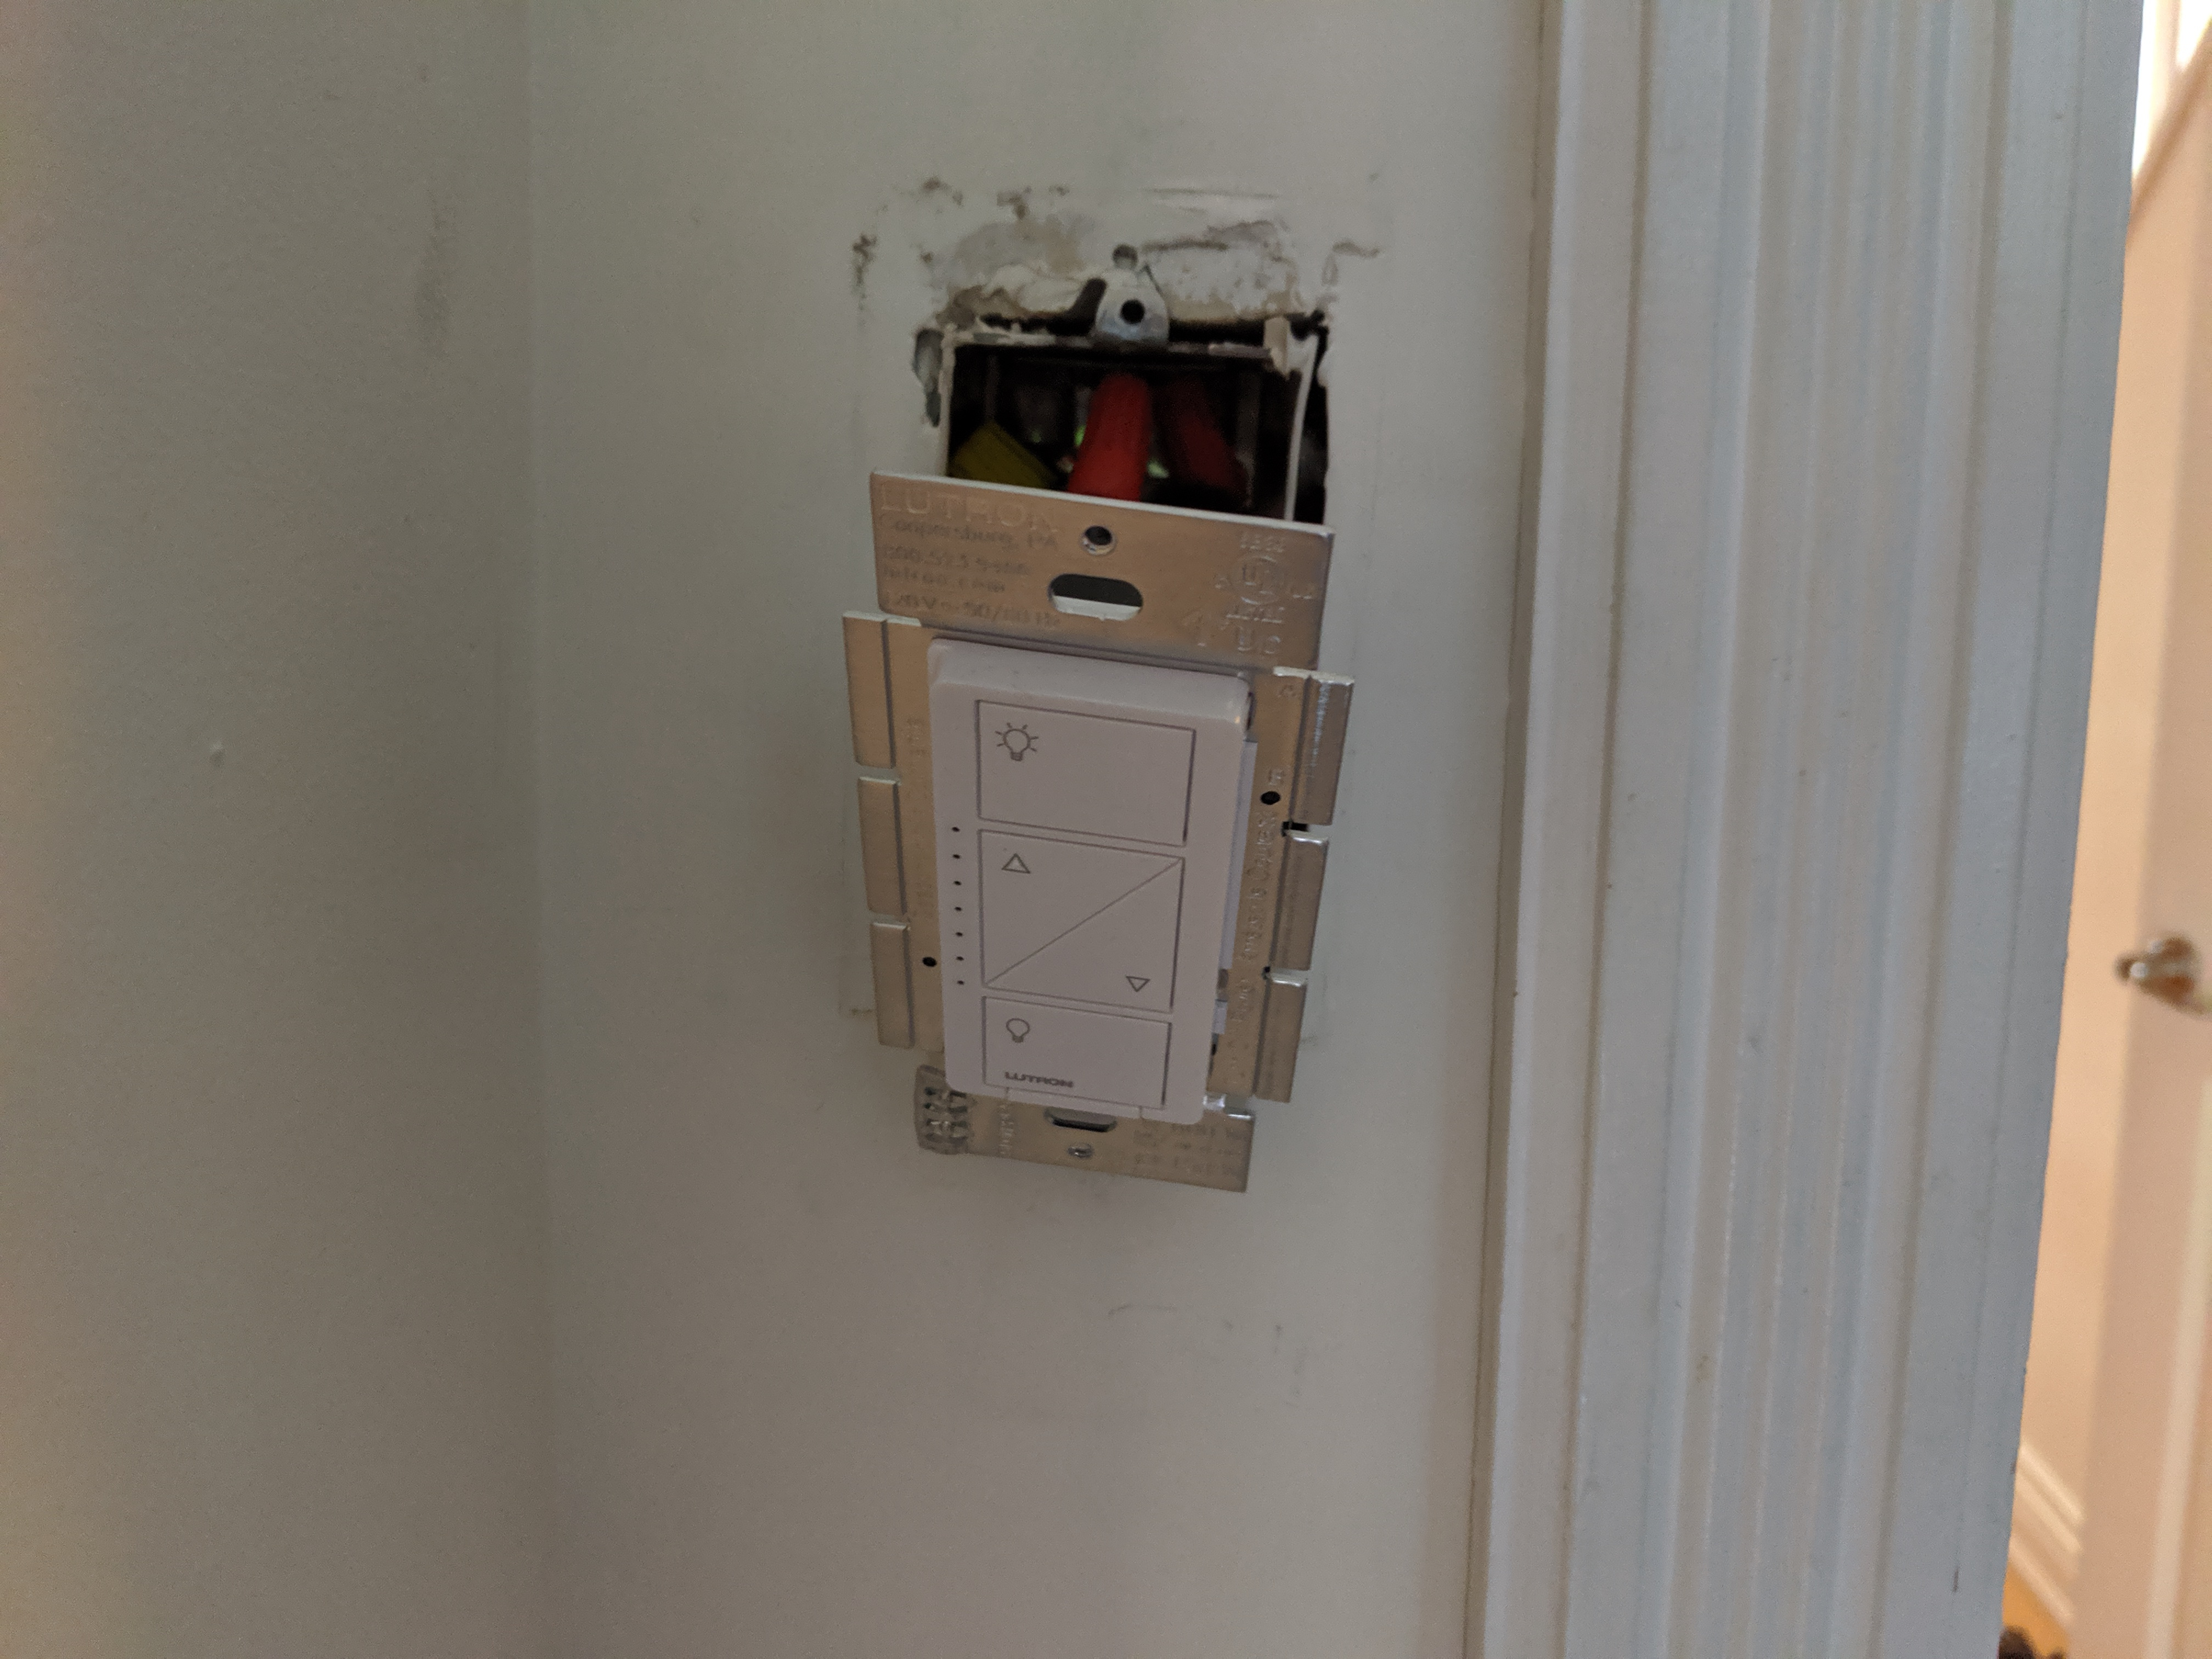
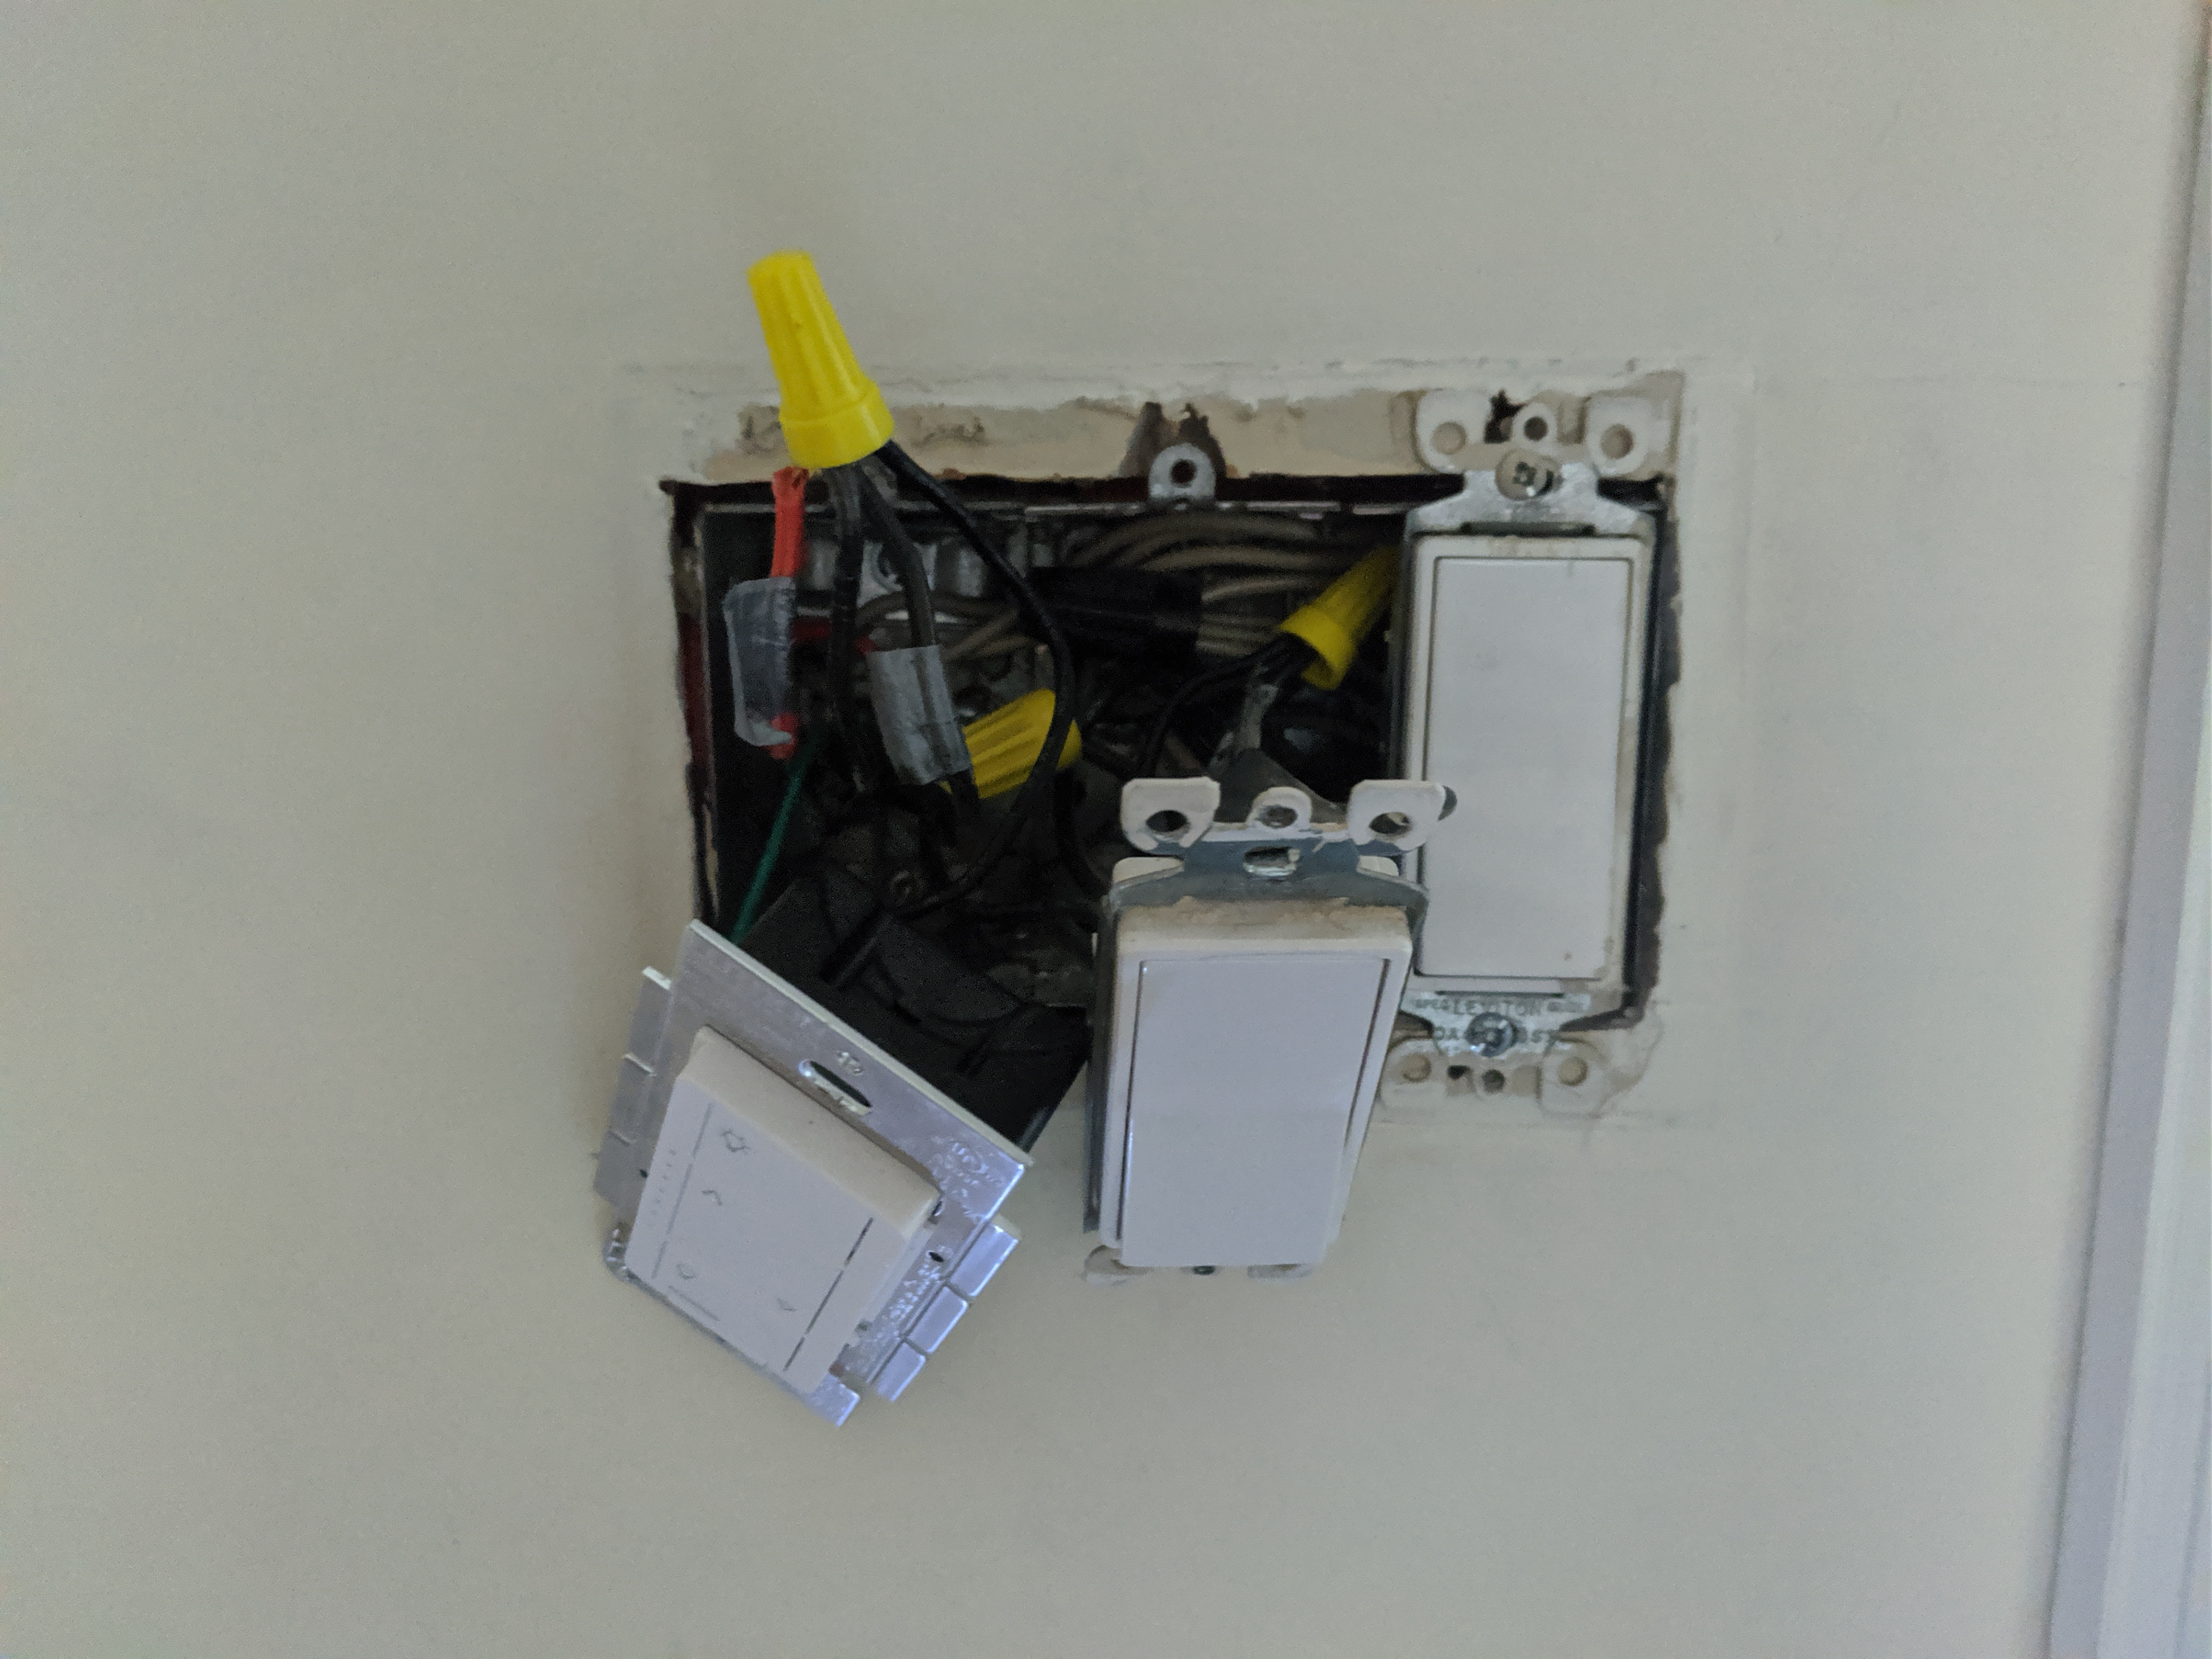
To verify this, you only need to open a single light switch and check the wiring. Remember to turn off the fuse for your light switch before you start unscrewing it.
Once you're sure the power is off, open a light switch by unscrewing the cover screws, then removing the screws that attach it to the wall underneath. Once it's loose, take a look around for a white cable—it may be connected to your existing light switch, but it's more likely that it's stashed away in the back of your electrical box.
If you don't see any white cables at all, you don't have a neutral wire, and you'll need to get the Lutron Caseta specifically to support your setup.
2) Three-way switches (multi-pole)
If you're looking to add smarts to a room that has multiple light switches that control the same lights—such as in a stairwell at the top and bottom of the stairs—you also need to buy a specific type of smart switch. This configuration is called multi-pole or three-way switching, and means that there's an additional pair of wires running between the two switches to allow them to sync up.
The recommendations in this guide all provide multi-pole options, and I link to the two different products where relevant. These setups are a little more difficult to wire yourself, however each product comes with a guide that helps detail how to go about doing it.
Cheap, reliable choice: Lutron Caseta
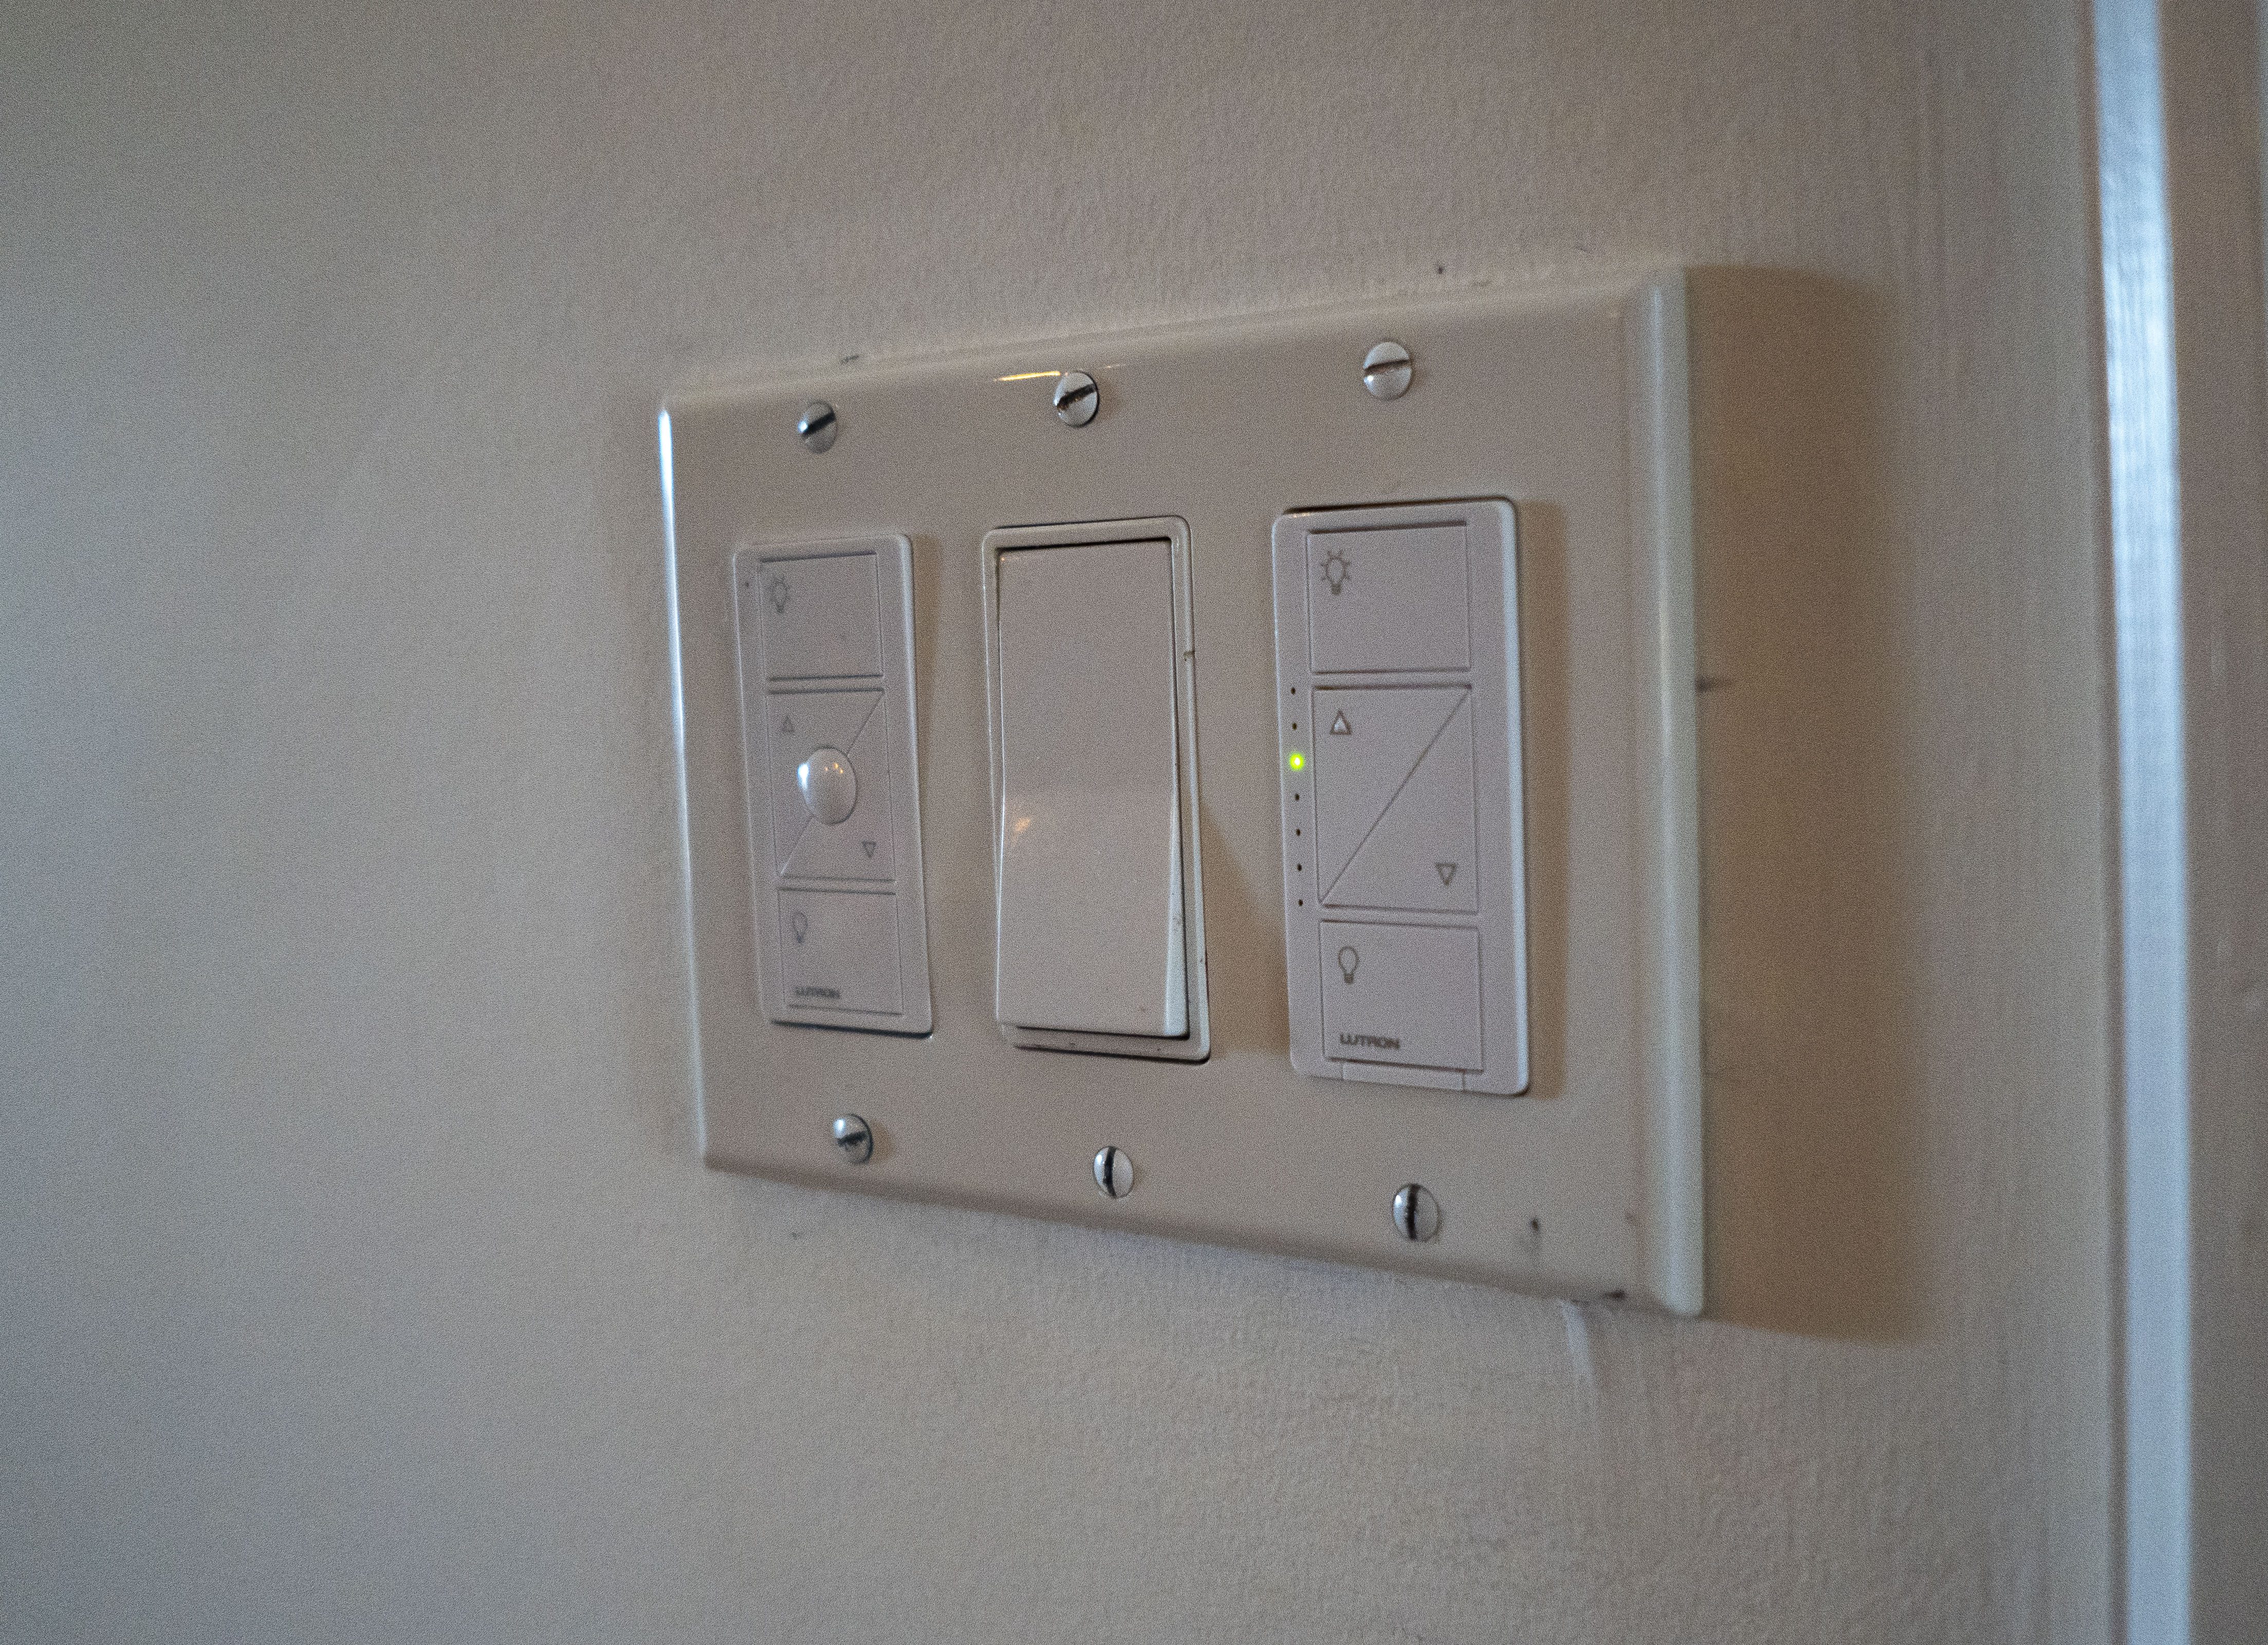
For homes with or without a neutral wire, Caseta is a fantastic smart switch upgrade. Not only does it only take a short amount of time to install, they're relatively cheap at around $60 for a switch and wireless remote, which can also be used in a multi-pole setup.
The company behind Caseta, Lutron, has been in the industry for decades and knows what it's doing—it provides dimming options, as well as fan control and other setups as well.
Caseta does require a hub to operate, which needs to be wired into your router, but it's rock-solid, and is compatible with all the things you'd hope: Apple HomeKit, Samsung SmartThings, Google Assistant, Amazon Alexa, and so on.
I like Caseta the most out of the array of options available because it blends in well with existing switches and doesn't break the bank. In our home, I've installed three of these switches and can't recommend them enough.
Single-pole (one switch): Buy on Amazon, $59 (US)
Multi-pole (two or more switches): Buy on Amazon, $64.95 (US, includes remote)
Starter kit (includes hub and switches): Buy on Amazon, $164 (US)
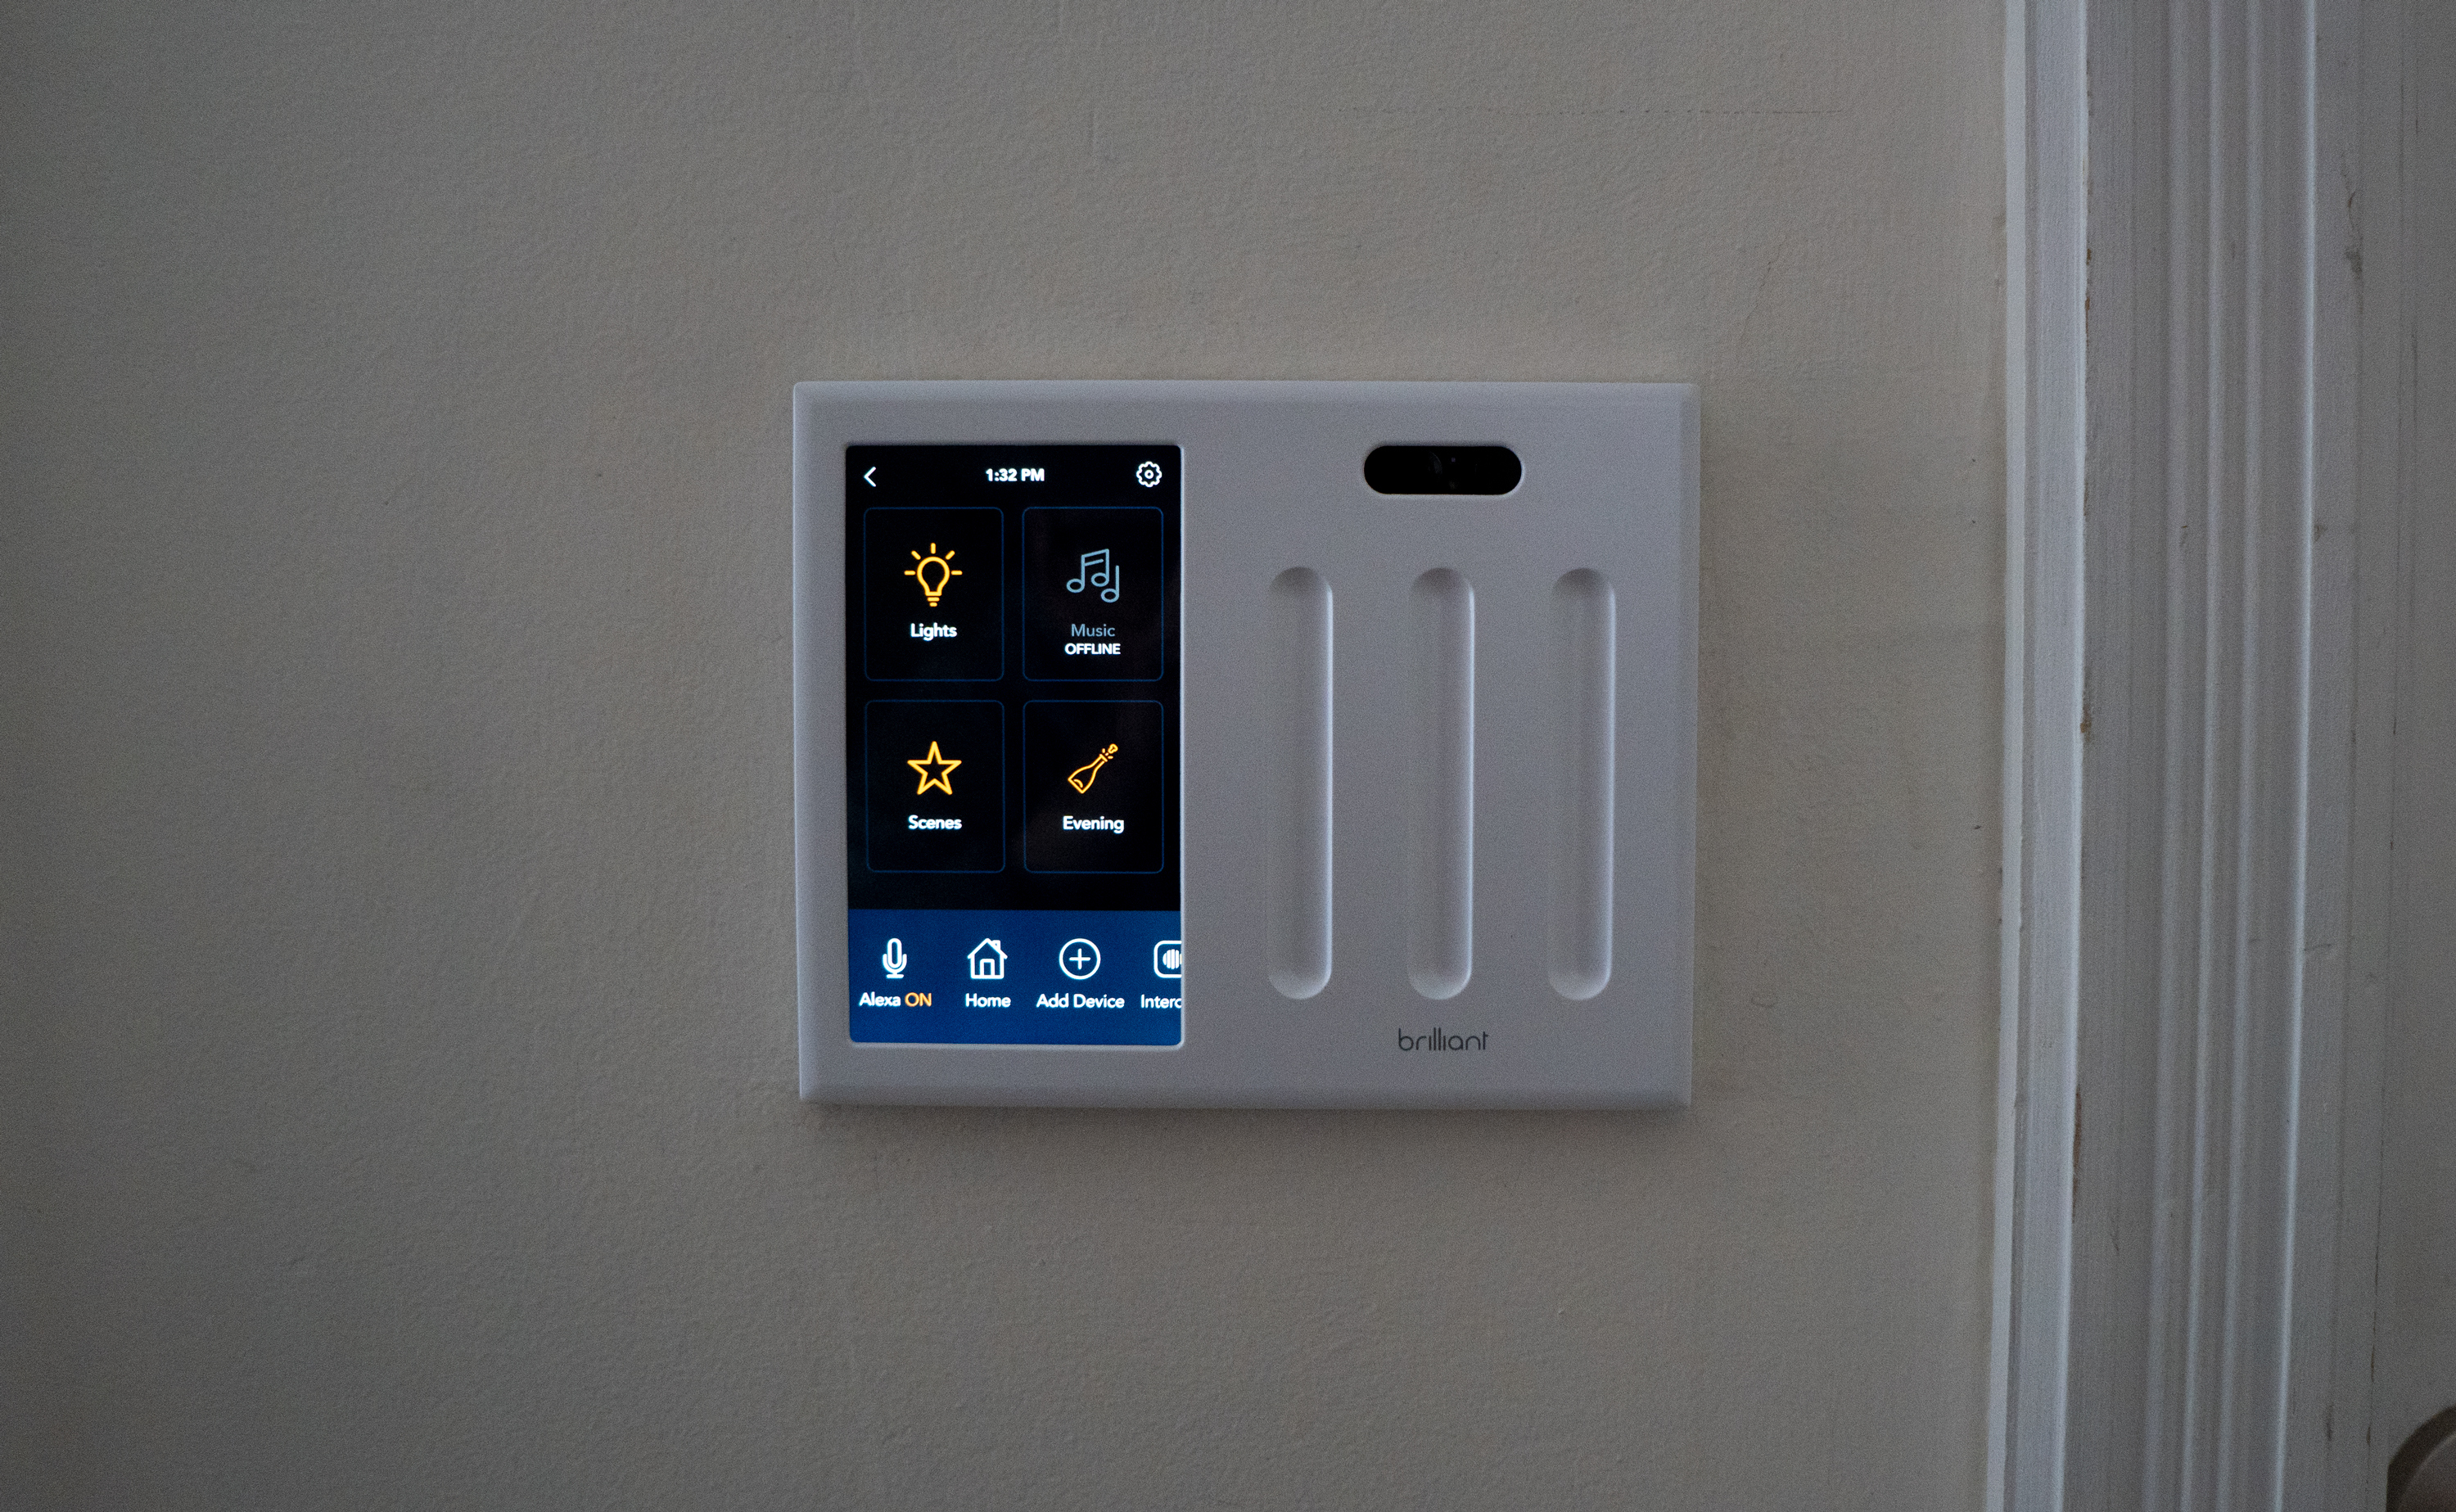
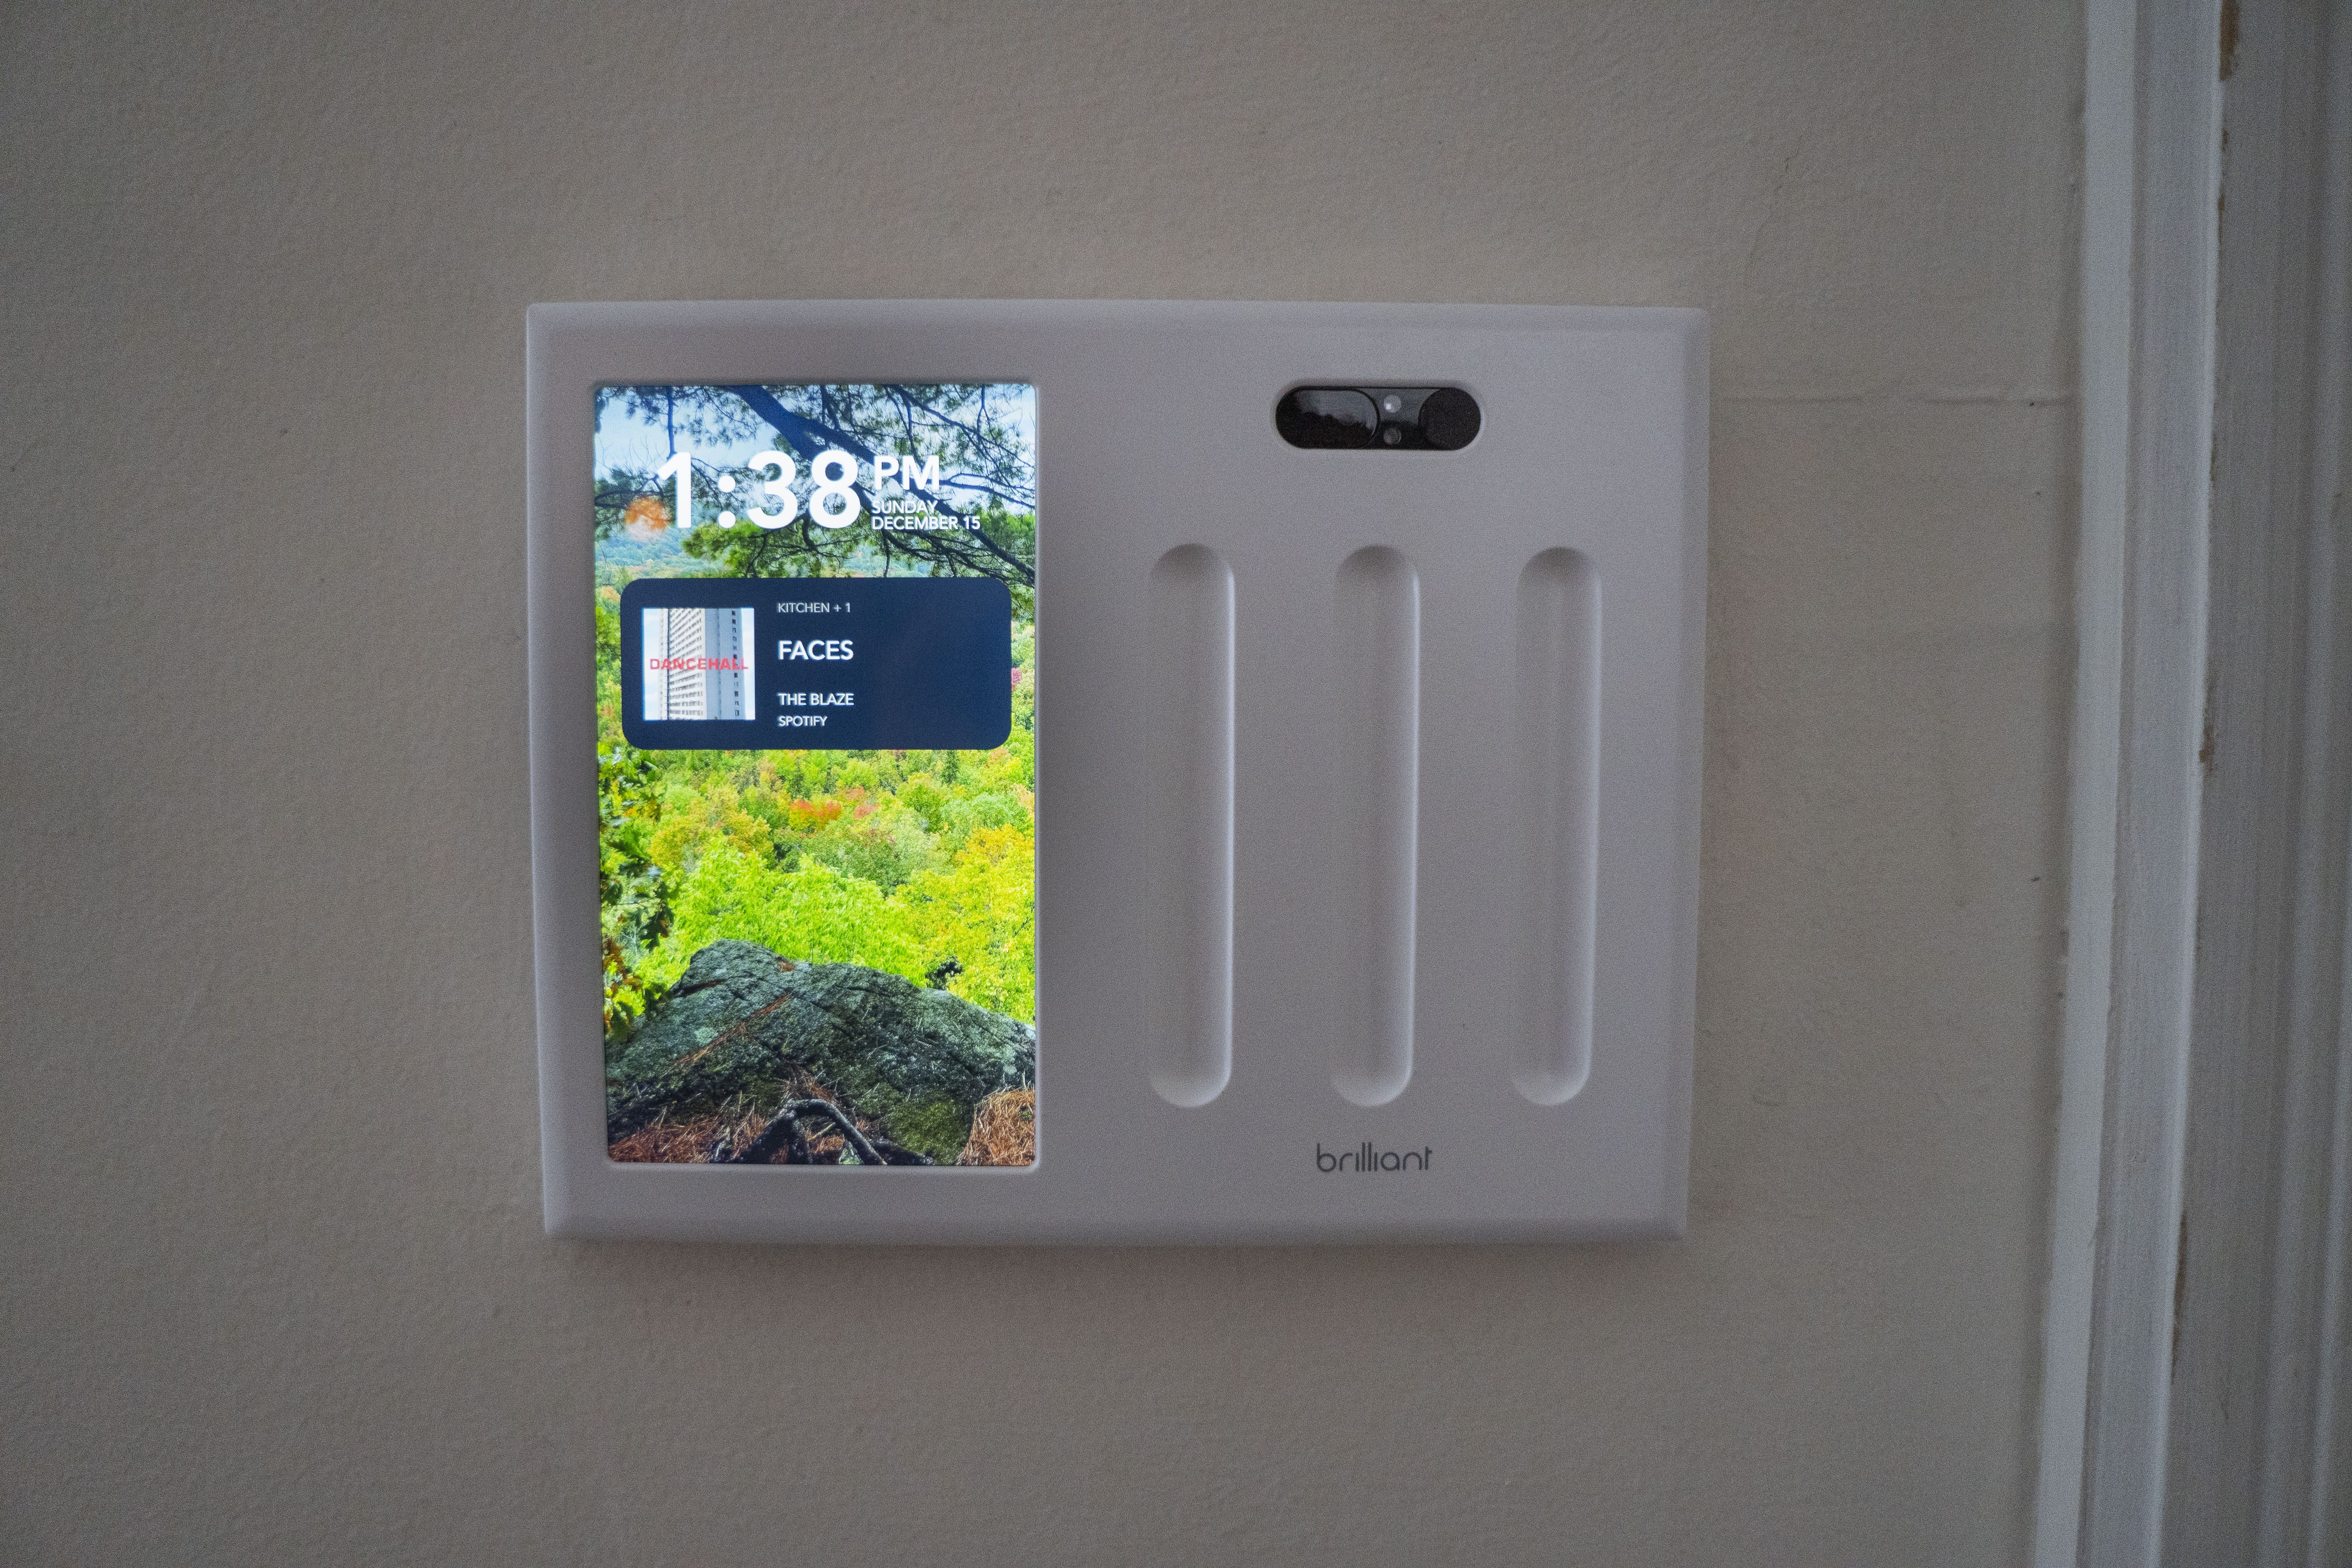
Upgrade, ultra-smart pick: Brilliant
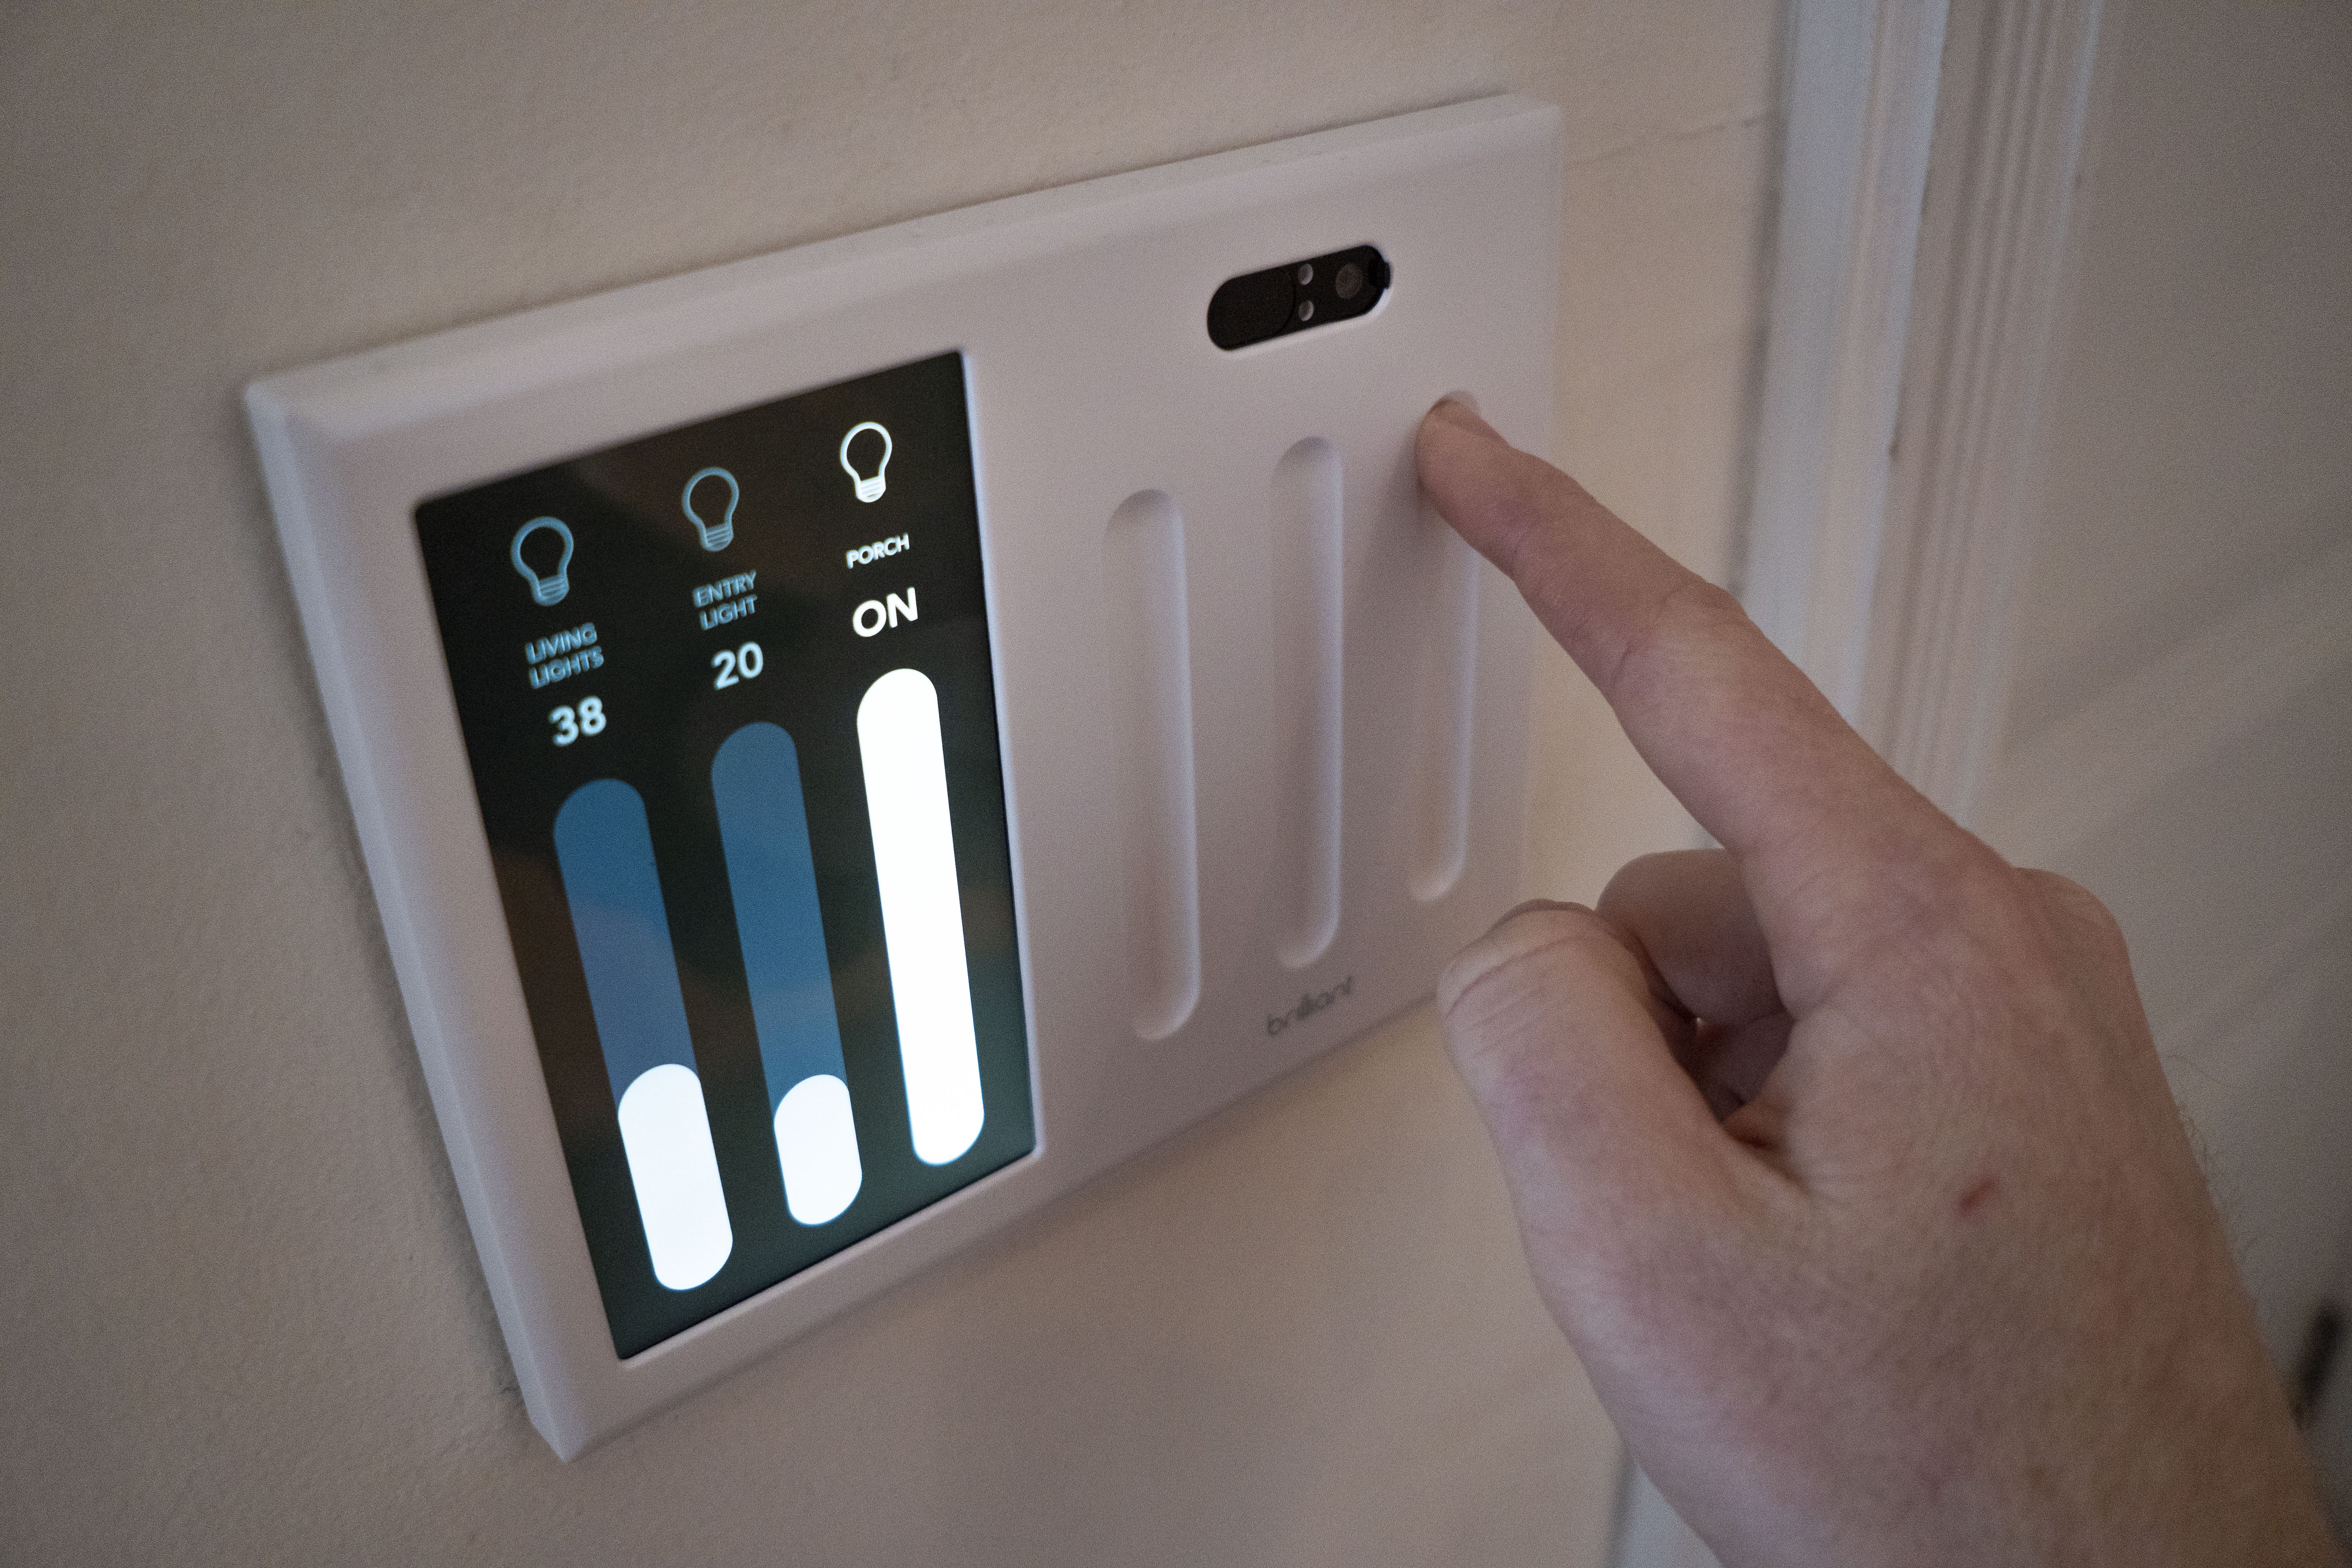
If you're looking for something a little more fancy, Brilliant is the ultimate smart switch. Not only does it replace your existing switches and allow direct control, it also plays nicely with other smart gadgets like Hue, allowing you to control them from a single device that isn't your phone.
Brilliant is interesting because it's essentially an iPod Touch glued to a smart switch—it's incredibly well designed and allows both automation of any smart gadgets you already have, as well as the devices directly wired to it. Additionally, it integrates with Alexa, which means you don't need an additional smart speaker kicking around if you want voice control.
I've set up my Brilliant to automate the porch lights so that they turn on at the beginning of the night, and off once we're all in bed. It's also one of the few switches—let alone smart devices—that integrates directly with Sonos, allowing direct control of your speakers and showing the currently playing track when you're not using it.
One concern I had with Brilliant is what would show on the display when it's idle, but the company included an 'ambient' mode that can show a slideshow of your favorite photos, along with the time and what music is playing. Getting the photos onto the device is a manual process, and I wish it integrated with Google Photos, but it's really nice to have a spot to show off my favorite shots.
The catch with these switches is the price, given all the extra bells and whistles you get thrown in: it starts at $299 for single switch control, but I'd highly recommend installing it in a spot with multiple switches so you can get the physical controls as well, which will run you $299-$399. That's a high price to pay if you're dipping in your toes, but I added one to my existing Caseta setup and it made the whole thing really sing.
Note: Brilliant's switches require a neutral wire to function. If you don't have a white neutral wire, you can't use these switches. It does, however, support multi-pole setups, if you plan to get multiple.
Buy direct from Brilliant: starting at $299 (US)
Runner-up: Kasa Smart Switch
These smart switches are cheap and easy to install, with many similarities to the Caseta—but they don't require an additional hub to operate because they connect directly to WiFi independently. That may appeal to some people, however it's the runner-up for me as I prefer the hub-based solution: it's faster, more reliable, and works entirely locally even if the WiFi is down.
Kasa works with Google Home and Alexa, but I find the company's app to be fiddly and confusing. Ultimately, the requirement to have a TP Link account is a disappointment and pushed me toward the Caseta setup—without an account, you can't use all of these switches' features.
Unlike Caseta, the Kasa smart switch requires a neutral wire to function, which may be a deal-breaker for your setup. All of this said, if you're looking for a budget switch and don't want an additional little hub hanging off your router, Kasa smart switches are the way to go.
Single-pole (one switch): Buy on Amazon, $19 (US)
Multi-pole (two or more switches): Buy on Amazon, $39 (US)
Wiring tips
Wiring switches yourself isn't incredibly difficult—and it'll save a bunch of money over hiring an electrician—but it can be intimidating for the first time. If you ever feel uncomfortable or unsure, I highly recommend hiring an electrician anyway, so that you and your home are safe.
When you approach wiring switches, there are generally 4-5 types of wires in your wall in North America:
- Hot wire: this is the 'live' electrical wire that comes from your switch box, providing the electrical power to the circuit. This is almost always connected to the brass screw on your existing switches.
- Load wire: this is the wire that connects your lights to the switch, and ultimately connects to the hot wire when your switch is turned on.
- Neutral wire (not always present): this wire carries the current back to the power source to control the voltage, and often is needed for high-end smart switches to safely control your lighting.
- Ground wire: this wire provides a safe connection to the earth, and protects against electric shock by providing a path out of the circuit that isn't your body.
- Traveler wires (multi-pole): only found in rooms with multiple switches controlling the same lights, the traveler wires provide a pathway for both switches to turn on and off your lighting.
Document your current wiring
When you're ready to begin installing your switches, turn off the fuse for the lights. Once you've done this, pop open the light switch cover and use your voltage tester pen to verify that the switches are disabled before continuing—it's for your own safety.
After you're sure there's no voltage, remove the wall screws from the switches you plan to replace. Before you wire up anything, take photos of your current switch wiring so that you can return it to normal if you need to. Then, find the 'hot' wire on the existing switch, which is generally connected to a 'brass' colored screw, and tie a small piece of electrical tape around the hot wire to differentiate it.
I like to mark this tape with a 'H' using a sharpie, so that it's truly clear in the future if someone else were to open this and upgrade the switches without me present.
Connect cables using wire nuts
I hadn't ever seen wire nuts before, as they're not available in my home country, but these magic little pieces of plastic help make it easy to safely connect wiring together. To connect two wires together with a wire nut, simply place both straight ends evenly inside the nut and twist it tightly together—give them a tug to be sure they're secure once you're done.
For an extra level of safety, you can isolate these wires by wrapping them below the nut with electrical tape. This isn't required, but can help ensure they don't come loose. If you end up with any loose or unconnected electrical wires always ensure that you cap them with a wire nut, so they don't inadvertently create a circuit inside your electrical box, which could cause a fire.
Smart switches, not smart bulbs
I started my journey into smart lighting with Philips Hue and still have a handful of the company's smart bulbs, but the truth is that using smart switches instead of individual smart bulbs has made my setup much simpler to control and configure.
For rooms that need ambient color lighting, I'll still use Hue, but I combine it with a smart switch that allows proper manual control with physical switches. The novelty of Hue alone quickly wears off when you need to convince everyone in your home to stop using the physical switches, so I recommend exploring smart switches first, then expanding to Hue once you've got the basics set up.
There are plenty of elaborate, much more complex options on the market like Decora and Insteon, but I've purposefully left these out of this review to focus on simplicity. Most of us don't want to spend hours setting up our smart homes, but those options exist if you do want to do that.
Spotted anything new that I should write about, or need help figuring out what's best for you? Fire away in the comments below and I'll try to help.